Showing posts with label DIY. Show all posts

December 1, 2012

Christmastime is here!

My husband said that I wasn't allowed to celebrate Christmas until December. Well guess what fools - today is December 1st! (24 more sleeps till Christmas!!)...but that really didn't stop me from Christmas celebrations at our house. I've been listening to Christmas music since...July...and I put up decorations the Monday after Thanksgiving.

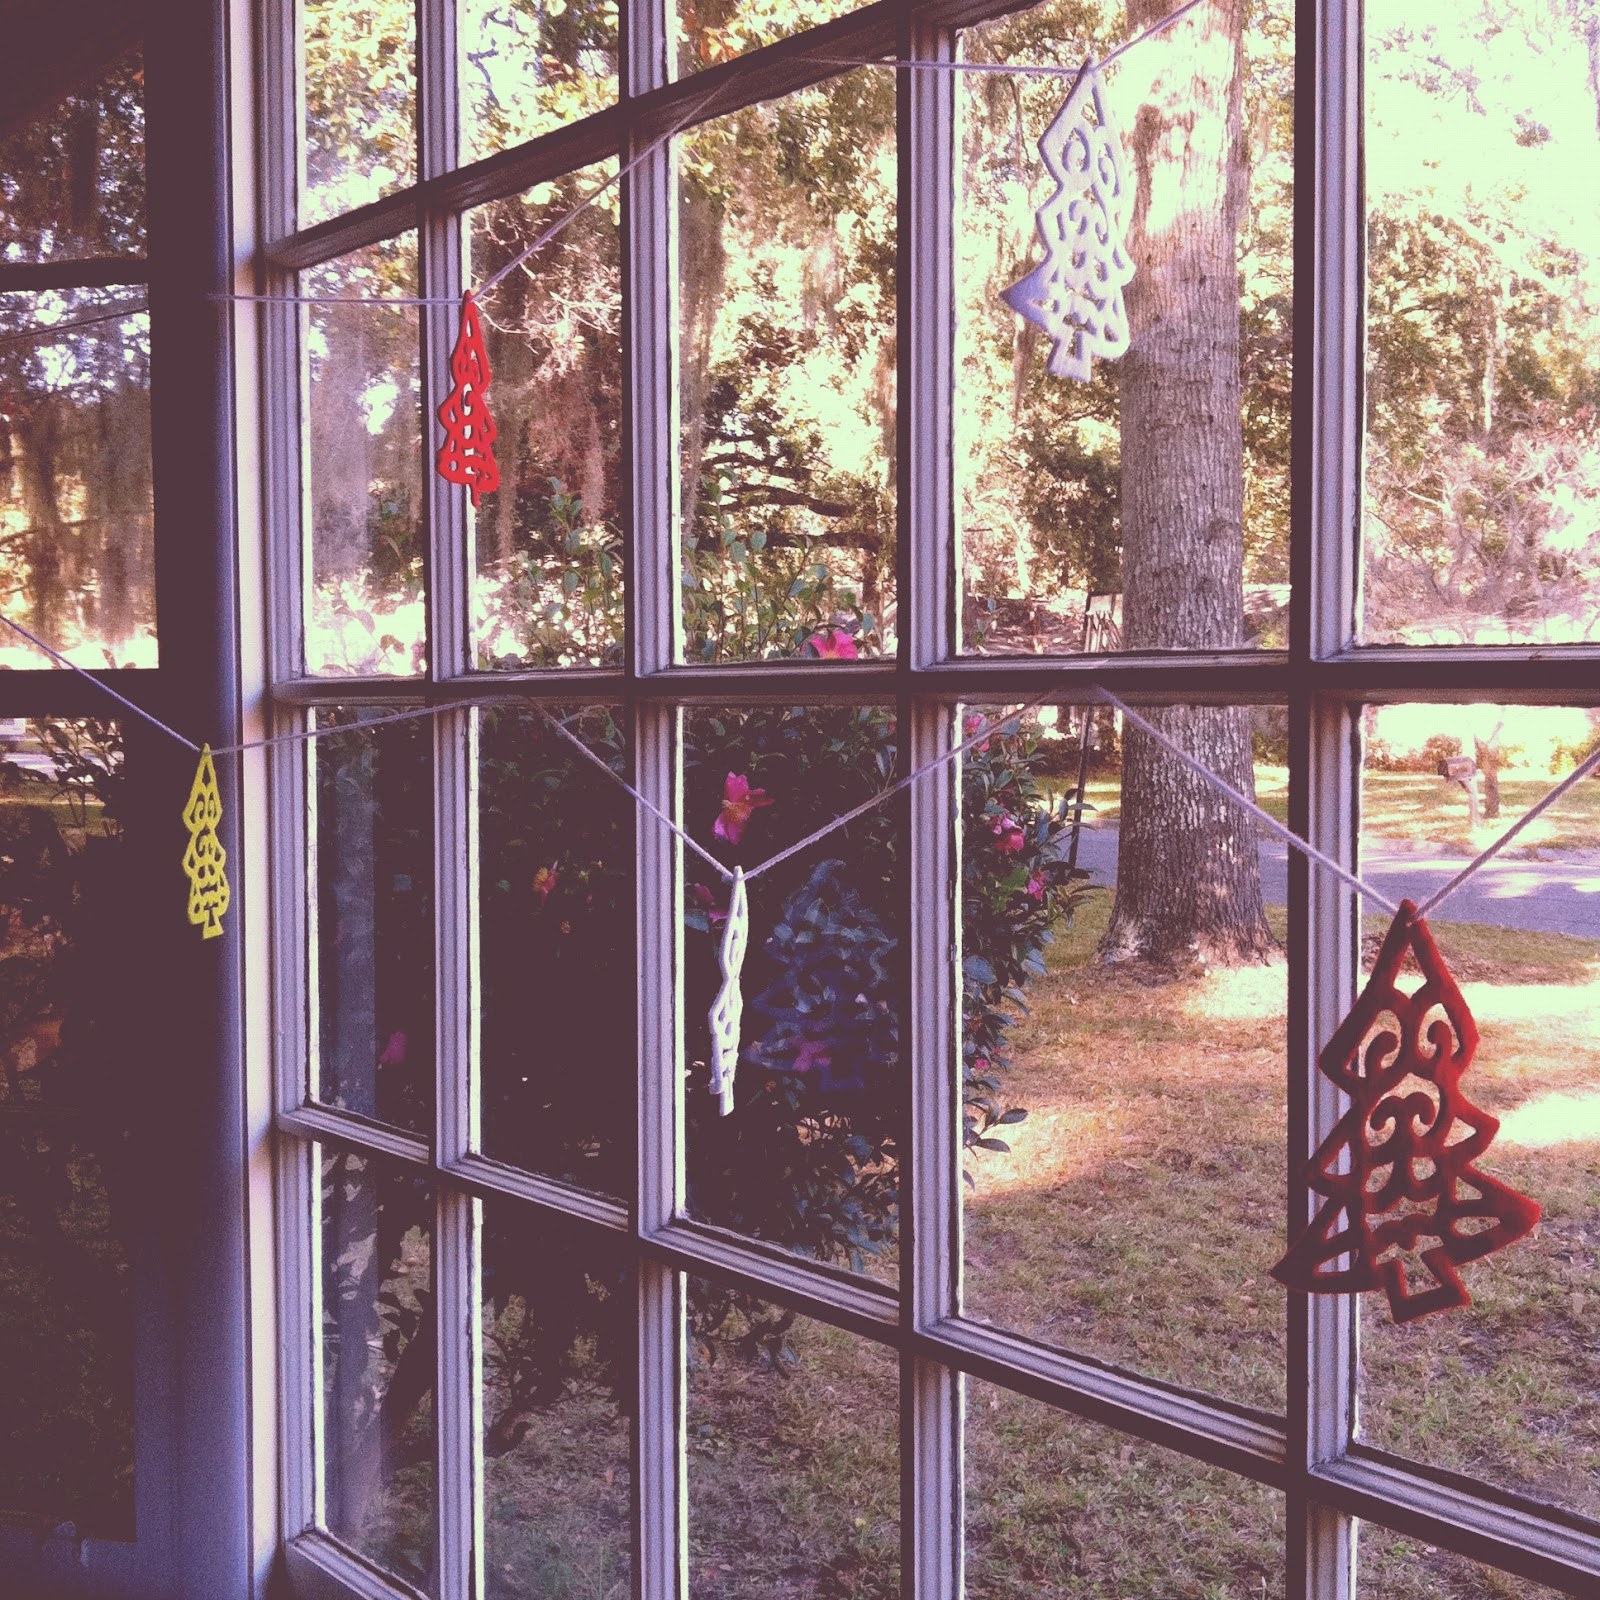
As with decorating my house, I'm all about decorating within my means (aka not spending a lot of money) and doing a lot of DIY to make my home 'my home'. Christmastime is no different! I already posted about decorating in preparation for the holidays, but this time I have gone all out and put up Christmas-y things to usher in the Advent season!

I'm all about using what you have (or in my case -- using what you've hoarded) around the house...and things that are free. It also helps that I have a mother-in-law who is the craft/DIY queen and a Christmas decorator extraordinaire - I have inherited many of her old decorations and other fun DIY things. When my husband was living on his own, his mom came and Christmas-bombed his house, complete with a fat Santa cookie jar, wreaths and Christmas lights.


I didn't know I was obsessed with Nutcracker statues until I saw a bajillion of them at Marshalls during Black Friday shopping. Luckily for me, I resisted the urge of buying all of them and found this man hanging out in my mother-in-law's Christmas box in our attic. #score


I love this decoration. I've seen tons of DIY/craft ideas using branches to hang things, and decided that if I found the right branch, I would make it into an ornament tree. As you can see, I found said branch and I also found awesome little ornaments in the Christmas box. I made two yarn pom-pom ornaments to complete the look. Oh! Remember that time I channeled my inner squirrel and hoarded little acorns from my backyard as vase fillers? They appear again as an anchor for my branch...collected this time by my loving husband. He sat outside with a flashlight one night and collected every acorn in that vase #truestory #besthusbandever

*Reason #2356763 why I am a crazy lady: I saw this branch lying in my in-laws' backyard while we were over for Thanksgiving and I immediately knew it was the one. I asked my mother-in-law if I could take/keep this branch I found, and she looked at me like I was a crazy fool. (She was all like "Who asks if they can take a branch from someone's yard?")


I have never had a real tree in my life. My family lived overseas for a good part of my childhood and access to a classic Christmas tree was only made possible by loving relatives mailing us a plastic one. I also get headaches when I smell live Christmas trees, so plastic is the way to go! And this year, our 2-foot fake tree is the perfect fit for our little family and our little home.

And finally, my favorite decorated piece...


The breakdown:
Deck board sign made by my mother-in-law.
Pine cones collected from a nearby school yard and hot glue-gunned to twine.
Christmas lights were in the Christmas box.
Window is usually there year-round; came from old church building that got renovated.
Red wire Santa sleigh has been hoarded since high school; was given to me with chocolates in it.
Old Christmas card of two people wrapped up in scarves and hats in the snow #cutenessoverload

So that's what's going on at our house! What have you done to decorate this year? What things have you made? I would love to see what you've done!

November 14, 2012

Decorating 'n stuff

I love to decorate. And I love crafting. Decorating with crafts? #brbdying

Seriously though, when I find a craft and pin it on my Pinterest board, my mind will not stop thinking about the craft until I do it.

So I went to doing! Here's the stuff I've been up to as of late:


So I love Goodwill. Not just because I can find amazing items for Halloween costumes, but because I can find jars and vases....and felted Christmas tree ornaments for a ridiculous price. I scoured Goodwills for months to collect milk glass vases and jars for my wedding for (at most) 50 cents a piece. These beauties happened to be marked .59 cents, but their blue tag was 50% off that day, so ended up getting 9 ornaments for a grand total of a bank-breaking $0.97. #booyah


These beauties are called acorns, and usually they are the bane of my husband's existence around this time of year. We have two huge trees that 'gift' us these little presents by a consistent drizzle of nuts hitting our grass-less ground. We try to mow the lawn, but these little fellas always manage to get chopped up and shot out...and embedded into the lawn-mower's shins (aka husband). Don't even get me started on the squirrels our yard attracts. Baxter probably has a forlorn blog out there somewhere about how he can never catch those pesky things...except for those three days a couple of a weeks ago where he successfully killed two squirrels. I channeled my inner squirrel and spent an afternoon picking the perfect little acorns for my fall-themed dinner table. I also pulled out our extra/unused 'redneck wine glasses' from our wedding and -- voila! A tablescape. I just need to find some candles to complete the look.


And finally! Look at what a girl can do with a hot glue gun, some twine, and pine cones collected in her neighborhood! Yes, I was that person on the side of the road on Saturday morning pretending to walk her dog. I brought Baxter along to make it look like it was normal for me to be stomping around pine straw to find the perfect pine cones (it kind of looks like I'm picking up his poop, right?...right?!?!).

The most addicting best part about crafting is that most of the time you save a whole lotta money and you can make your house look almost as cute as a Pottery Barn house (ok maybe not really, it's all in the imagination!). I always feel happy when I'm crafting, and the finished product always inspire me to keep crafting. Maybe it'll inspire you to start crafting too!

August 11, 2012

Project Do: Terrariums!


'Project Do' time! My friend Farmer Cait came over for a visit last weekend and came bearing gifts, including a cute little succulent from the farmers market. With all the hoopla nowadays over succulents and terrariums, I figured it was time I gave it a shot!

First I did some research. I used the Google machine and found a few posts that seemed somewhat helpful. West Elm's Front & Main post was pretty informative (and so cute!), but I really didn't know how to find all of the things they used (activated charcoal & billy buttons?!?). A post over at That's Quirky made a terrarium out of recycled pentagon-shaped light fixture that was pretty neat. However, the posts I found most helpful and inspiring were posts by a friend at her blog (here & here).


Armed with Home Depot giftcards from our wedding, I went shopping. I decided I would do a layer system using pebbles, moss, and cactus soil. Thankfully, Home Depot got the memo that succulents and terrariums are 'the thing' right now, and had a whole section where everything you could ever need for succulent tending and terrarium building near the front of their garden section. I lingered and contemplated how much I needed more succulents, but decided that I should probably make sure my succulent doesn't die before I subject other plants to my wrath.

Cait and I had originally planned on making a terrarium last week when she was here, but we didn't realize how much extra 'stuff' we needed. So in efforts to start the terrarium creation process, we went to Goodwill and found a lovely little glass dish to put my succulent in ($1.99 holla).

With my dish and my Home Depot purchases, I started creating. First the pebbles, then some moss, then some cactus soil. Then I made a little divet in the soil for my succulent. I decided to put some pebbles around the edge to hide the extra soil space that was there.

Ta-da!

As I was admiring my newly created terrarium, I had an idea to make a terrarium out of an extra jam-jar goblet my mother-in-law made for our wedding. Doing the same layering system, I created a mini terrarium and I am in. love.

!!!!!

Farmer Cait told me that she was informed that when succulents keep growing, you can take some from the bunch you have, plant it, and it's supposed to grow more! Hooray for gifts that keep on giving! I just need to remember to check the soil moisture every few days and water as necessary!

**I haven't posted a 'Project Do' post in a while, the last time I did was in 2011 (Sewing Kit & Speedy-Carve "Thank You"). It was nice to 'do something' again!

March 4, 2012

Sneak Peek

This is what I did this afternoon:


My invitation was made up of two (free!) design templates (Tandem Bike Invitation Suite + Monogram Invitation Suite) thanks to Wedding Chicks! I purchased a little handy-dandy perforating tool from Michaels to split up my RSVP and information cards. I bought brown bag kraft envelopes and plain white mini envelopes from Envelope Mall online. Finally, I purchased 240 yards (!!) of Lemon Yellow Divine Twine Baker's Twine from BahanaSplitsBoutique on Etsy.

Whoever said that DIYing your own wedding isn't worth it was wrong. It's totally worth it, saves a lot of money and I had a lot of fun! They were right about one thing though: this insane crick in my neck from working so hard.

In other news, we get married in 83 days! Eek!

December 19, 2011

Project Do: Merci!

Since I don't have the money to buy a tabletop press (yet), I started exploring other ways to make beautiful things. Enter: Speedball Speedy Carve & Block Printing kit. Best investment I have ever made, and it is so easy! The tools are easy to use, and Speedy Carve is easier to carve than the classic linoleum block. It has the same texture and softness as those pink erasers, so carving them is pretty simple. Since I don't consider myself to be ultra-artsy, I'm ok with the smooth texture and feel of speedy carve versus the wood texture of a linoleum block. You may find that you like block better; all I can tell you is that the block irritates the heck out of me and I usually find a way to injure myself when I use the linoleum.


In the spirit of Project Do, I made thank you cards out of this beautiful font I found online. I printed "merci" out in several sizes. I found a size that I thought fit my speedy carve block best. Then I outlined "merci" with pencil, and imprinted it onto the block by turning it over and rubbing my pencil outline into the block. I carved out all the parts contained within the pencil lines using my carving tools and voila! Got myself some ink and printed away. I need to work on my carving skills and get my work to be more rounded, but I am very pleased with my outcome.

This is only the beginning of my adventure with pseudo-block printing. As I prepare to get married and start budgeting myself, I want to do as many DIY things as possible. This carve can be re-used many times, in varying colors. Maybe one day I'll carve out a border around it and make something new out of something used! The possibilities are endless, and it's exciting.

December 2, 2011

Project Do: Sewing Kit

I'd like to introduce you to the newest member of this lovely blog - "Project Do". This is my attempt at adding some DIY happiness to the blog! As the holidays approach, I cannot stop oogling at pinterest and getting inspired to do more DIY projects. I did a post a couple of weeks ago about making this season of giving a little bit more special, and included a DIY project of monogrammed kitchen towels.

About a week later, I decided to 'make' my very own sewing kit. After making the monogrammed towels, the basket of sewing stuff that I had inherited/borrowed from my mother tipped over and allllllllllll of the contents spewed out. I'm talking like thread unspooled, needles strewn across the floor and waiting to pounce on my bare feet. It was a near disaster.

Until! I realized I could do a DIY project I've been itching to do - sewing kits with mason jars! I first came across this idea while perusing Etsy. Then I found a how-to on Martha Stewart's website, and I had to try it!


I'm all about following directions...until I find out I don't have all the things the how-to tells me I need. So I improvise! Instead of batting, I used old socks. I took one sock, cut it in half, then rolled it into itself to make a pseudo ball. I also don't have a hot glue gun. I had a stapler! So I stapled the fabric, sock, and cardboard together. Almost included a few fingertips too.

I used the detachable jar lid and traced a circle onto the cardboard (this was the top of an old shoe box). Then I took that rolled up sock and placed it on top. Then I took/ripped off a sleeve of that lovely shirt (that I have hoarded since 2008/since I couldn't fit in it anymore, but couldn't give away because the fabric is beautiful) and stretched it over the sock and cardboard. Many staples later, I shoved this protruding sock-monster through the jar lid rim, and screwed it on top of the jar. It doesn't fit quite snug, only because the cardboard was thick. But I shoved the lid on and it stays shut!

I have named her Francis. She's sassy and fabulous.

I love it. She's beautiful. Have I sewed anything/used this since I made it? Nope. But she's there if I ever need her! What a great gal!