Showing posts with label Project Do. Show all posts

August 11, 2012

Project Do: Terrariums!


'Project Do' time! My friend Farmer Cait came over for a visit last weekend and came bearing gifts, including a cute little succulent from the farmers market. With all the hoopla nowadays over succulents and terrariums, I figured it was time I gave it a shot!

First I did some research. I used the Google machine and found a few posts that seemed somewhat helpful. West Elm's Front & Main post was pretty informative (and so cute!), but I really didn't know how to find all of the things they used (activated charcoal & billy buttons?!?). A post over at That's Quirky made a terrarium out of recycled pentagon-shaped light fixture that was pretty neat. However, the posts I found most helpful and inspiring were posts by a friend at her blog (here & here).
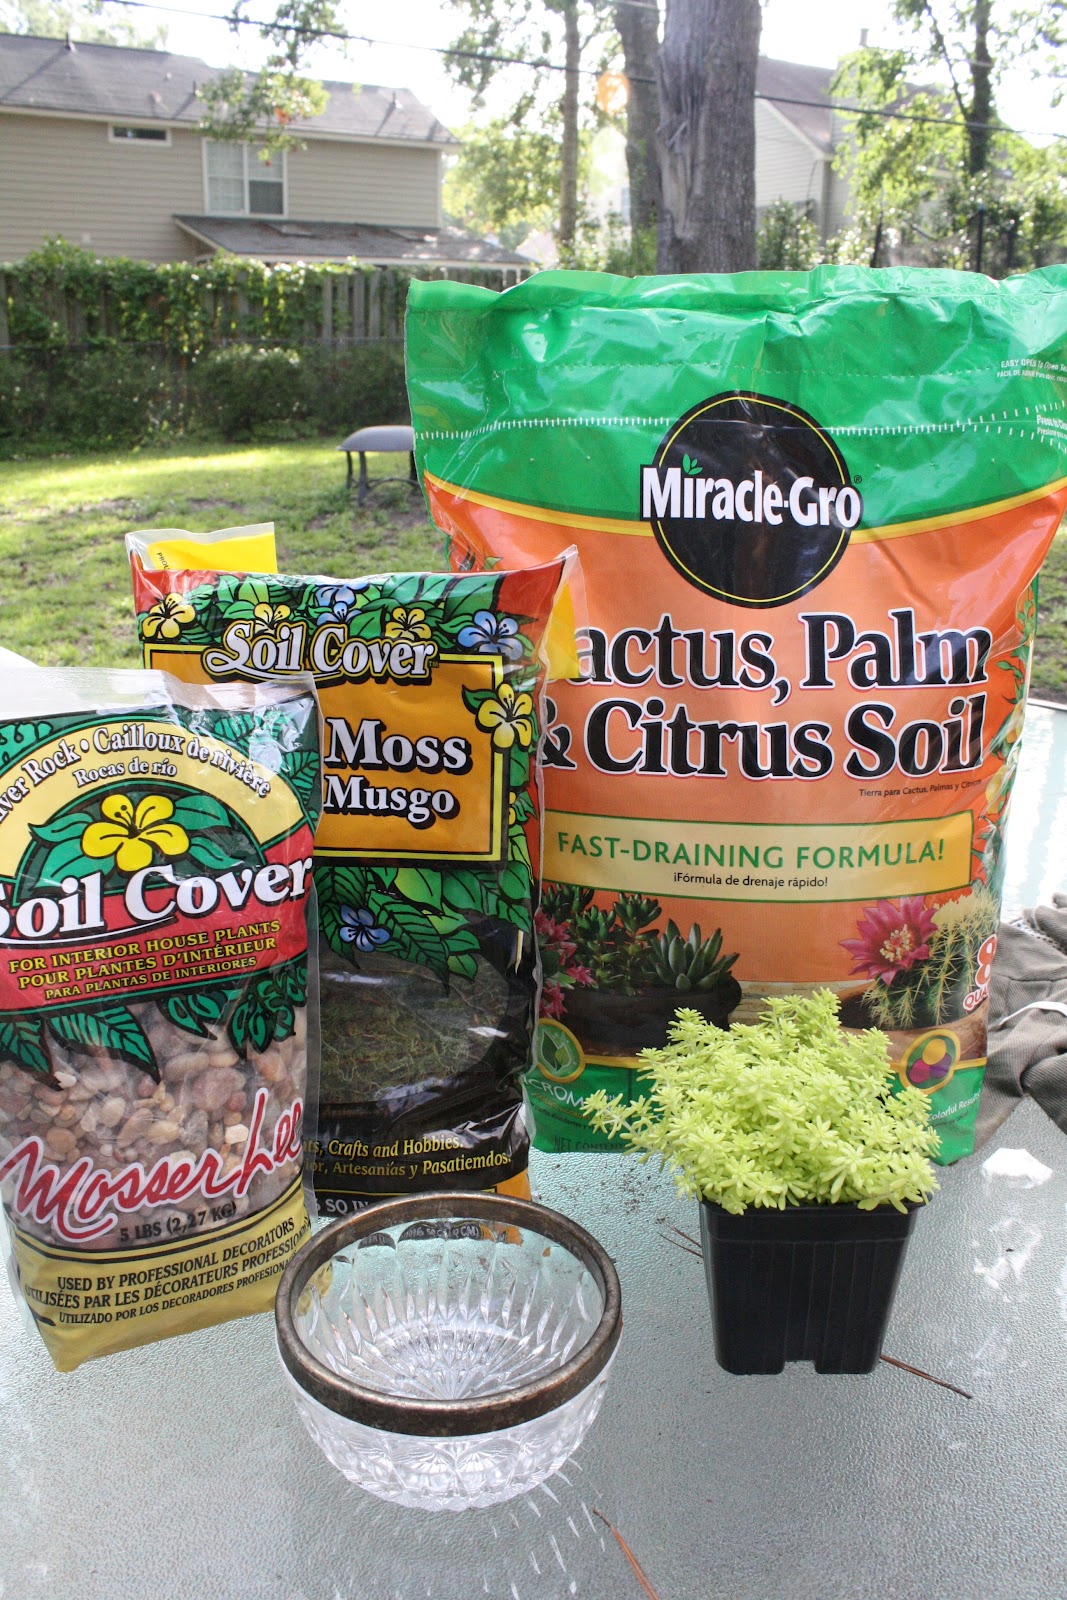

Armed with Home Depot giftcards from our wedding, I went shopping. I decided I would do a layer system using pebbles, moss, and cactus soil. Thankfully, Home Depot got the memo that succulents and terrariums are 'the thing' right now, and had a whole section where everything you could ever need for succulent tending and terrarium building near the front of their garden section. I lingered and contemplated how much I needed more succulents, but decided that I should probably make sure my succulent doesn't die before I subject other plants to my wrath.

Cait and I had originally planned on making a terrarium last week when she was here, but we didn't realize how much extra 'stuff' we needed. So in efforts to start the terrarium creation process, we went to Goodwill and found a lovely little glass dish to put my succulent in ($1.99 holla).

With my dish and my Home Depot purchases, I started creating. First the pebbles, then some moss, then some cactus soil. Then I made a little divet in the soil for my succulent. I decided to put some pebbles around the edge to hide the extra soil space that was there.

Ta-da!

As I was admiring my newly created terrarium, I had an idea to make a terrarium out of an extra jam-jar goblet my mother-in-law made for our wedding. Doing the same layering system, I created a mini terrarium and I am in. love.

!!!!!

Farmer Cait told me that she was informed that when succulents keep growing, you can take some from the bunch you have, plant it, and it's supposed to grow more! Hooray for gifts that keep on giving! I just need to remember to check the soil moisture every few days and water as necessary!

**I haven't posted a 'Project Do' post in a while, the last time I did was in 2011 (Sewing Kit & Speedy-Carve "Thank You"). It was nice to 'do something' again!

February 10, 2012

Lately

Instead of blogging, I've been living. And by living, I mean:

Shoveling snow and ice on the weekends.

Having lived in Maryland since 8th grade, I am used to snow. "Used to snow" = if it doesn't snow enough, I'm upset. Especially now that I work at a school, I pray harder for snow days than I do anything else in my life. Not really, but yes.

Remembering that I'm a student and realizing I have reading to do.

All my memories of psych research classes in undergrad and research methods last year come flooding back, and I have learned that even purple colored highlighters don't make these readings any more interesting.

Working at a school where sick children yell in my face and consequently get me sick too.

My internship/free labor services have resulted in contracting the awful school-flu bug. I seem to have sweated out the chills and the runny nose, but have this lingering, disgusting cough. In the last week alone, I have consumed my weight in honey lemon cough drops. Now I'm afraid I'm faking a cough just so I can seek familiar relief from these little soothing saviors.

Painting & Creating.

Spring Chicken Spring was done for my beautiful and wonderfully talented friend Cait. If any of you are in Atlanta, her photography is being showcased (!!) at Indie-Pendent! The other "painting" was done on a whim one Sunday afternoon because I was avoiding school work and rediscovering my love for water color. True story: I spent all my tip money on water colors and paint brushes. Who am I?!

All this to say -- my life is crazy and different every day. The older I get, the more I realize that I have so many roles and they change constantly depending on my list of to-dos or my mood. However, what I have come to appreciate is that I am discovering that I am different every day, but still the same. I have been created to do so much more than I can imagine, and it is evident in my current life-state (student, social worker, wine-shop cashier/cheese plate maker, artist).

What have you discovered about yourself lately? What things have been nice to find out about yourself and what you've been created to do?

December 19, 2011

Project Do: Merci!

Since I don't have the money to buy a tabletop press (yet), I started exploring other ways to make beautiful things. Enter: Speedball Speedy Carve & Block Printing kit. Best investment I have ever made, and it is so easy! The tools are easy to use, and Speedy Carve is easier to carve than the classic linoleum block. It has the same texture and softness as those pink erasers, so carving them is pretty simple. Since I don't consider myself to be ultra-artsy, I'm ok with the smooth texture and feel of speedy carve versus the wood texture of a linoleum block. You may find that you like block better; all I can tell you is that the block irritates the heck out of me and I usually find a way to injure myself when I use the linoleum.


In the spirit of Project Do, I made thank you cards out of this beautiful font I found online. I printed "merci" out in several sizes. I found a size that I thought fit my speedy carve block best. Then I outlined "merci" with pencil, and imprinted it onto the block by turning it over and rubbing my pencil outline into the block. I carved out all the parts contained within the pencil lines using my carving tools and voila! Got myself some ink and printed away. I need to work on my carving skills and get my work to be more rounded, but I am very pleased with my outcome.

This is only the beginning of my adventure with pseudo-block printing. As I prepare to get married and start budgeting myself, I want to do as many DIY things as possible. This carve can be re-used many times, in varying colors. Maybe one day I'll carve out a border around it and make something new out of something used! The possibilities are endless, and it's exciting.

December 2, 2011

Project Do: Sewing Kit

I'd like to introduce you to the newest member of this lovely blog - "Project Do". This is my attempt at adding some DIY happiness to the blog! As the holidays approach, I cannot stop oogling at pinterest and getting inspired to do more DIY projects. I did a post a couple of weeks ago about making this season of giving a little bit more special, and included a DIY project of monogrammed kitchen towels.

About a week later, I decided to 'make' my very own sewing kit. After making the monogrammed towels, the basket of sewing stuff that I had inherited/borrowed from my mother tipped over and allllllllllll of the contents spewed out. I'm talking like thread unspooled, needles strewn across the floor and waiting to pounce on my bare feet. It was a near disaster.

Until! I realized I could do a DIY project I've been itching to do - sewing kits with mason jars! I first came across this idea while perusing Etsy. Then I found a how-to on Martha Stewart's website, and I had to try it!


I'm all about following directions...until I find out I don't have all the things the how-to tells me I need. So I improvise! Instead of batting, I used old socks. I took one sock, cut it in half, then rolled it into itself to make a pseudo ball. I also don't have a hot glue gun. I had a stapler! So I stapled the fabric, sock, and cardboard together. Almost included a few fingertips too.

I used the detachable jar lid and traced a circle onto the cardboard (this was the top of an old shoe box). Then I took that rolled up sock and placed it on top. Then I took/ripped off a sleeve of that lovely shirt (that I have hoarded since 2008/since I couldn't fit in it anymore, but couldn't give away because the fabric is beautiful) and stretched it over the sock and cardboard. Many staples later, I shoved this protruding sock-monster through the jar lid rim, and screwed it on top of the jar. It doesn't fit quite snug, only because the cardboard was thick. But I shoved the lid on and it stays shut!

I have named her Francis. She's sassy and fabulous.

I love it. She's beautiful. Have I sewed anything/used this since I made it? Nope. But she's there if I ever need her! What a great gal!